
Google Adsense is a top context-specific advertising network. It is Google’s monetization system in action. It is the most popular advertising platform among all users. This Adsense Approval Guide will help you get Google Adsense fastly.
Until now, the AdSense approval process was straightforward, you create a new AdSense account, your account is reviewed, the AdSense team accepts your application, and you can begin monetizing your site easily.
But after time and specially from 2022 Adsense has modified the Adsense approval process in order to maintain the quality and to make it easier for new publishers as well. Due to this, Google Adsense is getting strict nowadays specially in 2023.
AdSense’s New Account Approval Procedure is as follows
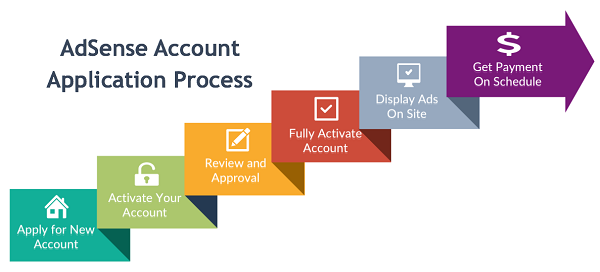
1. Ensure your website is compatible with AdSense.
2. Sign up for an AdSense account.
3. Login to your AdSense account.
4. Add the AdSense code.
5. Wait for 1-2 weeks for final review & approval.
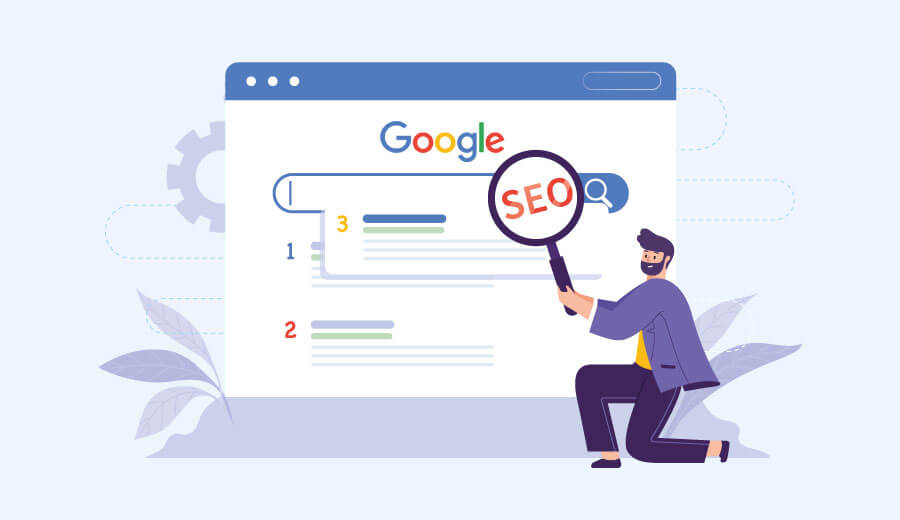
How to Get Google Adsense Approval Fast?
Google Adsense is google’s monetization system for its publishers. It is one of the most popular advertising platforms among all users. To know more about What is Google Adsense in detail, you have to keep reading this guide.
It provides users with far more flexibility than competitors like Media.net, Adsterra, Ezoic, Propellar Ads, and many others. Google Adsense generates a sizable amount of revenue for its users on a daily basis.
The majority of website’s revenue is derived solely from Adsense. Every new blogger wishes to make money with Google Adsense.
Unfortunately, most people do not get approval from Google Adsense. In this article, I will discuss some important tips and tricks with you, which you can follow to get your newly launched blog approved with Google Adsense faster.
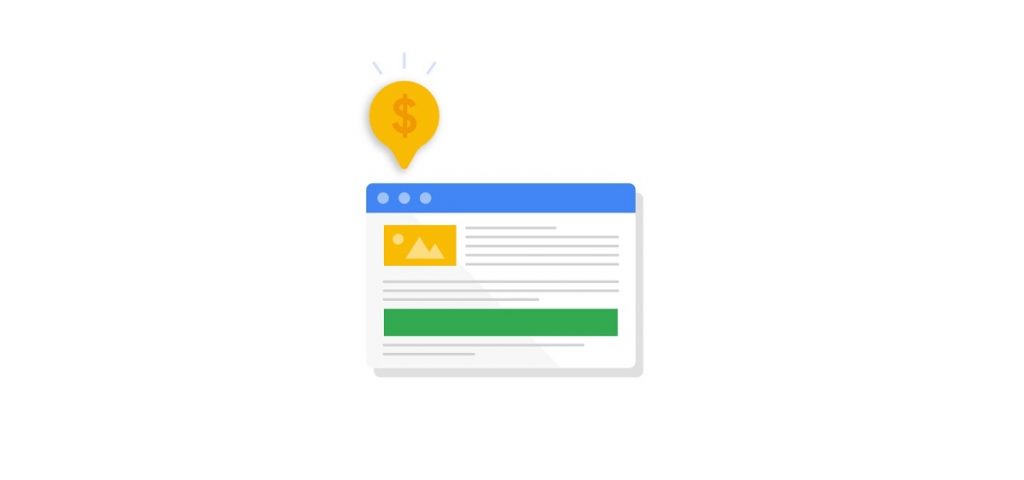
Whether you’ve just started an online business or have been doing so for a while, Google AdSense is the most popular ad network and the fastest way to start monetizing your website traffic with the help of display ads. This ad network provides a diverse range of ad units for a variety of platforms and devices, as well as optimization tools.
In a common situation, your application would be reviewed within 48 hours, at rare cases it can take up to 7 Business Days. Once your application is approved, ads will begin to appear on your blog, and which is the first step for making money.
Google Adsense can be integrated into a website/blog, a YouTube channel, an Android or iOS app, and so on. In this blog, I will only discuss about Integrating Google Adsense with websites.
It’s not difficult to obtain Adsense approval. You simply need to follow the rules outlined below to receive approval as soon as possible.
1. Create Some Important Pages

Every website should have a few key pages. For instance, Homepage, About, Contact us, Disclaimer, and Policy Pages like Terms and Conditions, Privacy Policy, and Disclaimer. You can find a basic format of these required Pages here.
You can make as many pages as you want, but these are the most important ones to get Adsense approval.
These pages provide information about you as well as your blog’s content. It will aid Google in making its services more transparent and legal. Google only allows blogs that are legally operating. Illegal or hidden blogs will never be approved by Google Adsense.
2. Write Unique Content
Content is King! and I mean it. If you want to stay for the long in this world of Google Adsense, then you have to post good quality content on your website. Also, you will need to create your own content. You must understand that no one can steal someone else’s content from another website.
Tip : Make your Content 100% Plagiarism Free.
All bloggers are required to create their own content. Google Adsense will never allow you to copy and paste a blog post. Make your content more interesting and one-of-a-kind.
As a result, more people will benefit from your blog’s content. If you copy even a single line from any blog, Google can penalize you. Google may refuse to index your site. You should exercise caution when it comes to content copyright. Every site owner owns the copyright to his or her content.
So you’ll also be writing your own content, and you’ll own the rights to it. A well-written blog post should be between 750 and 1000 words long.
You cannot finish a topic that is less than this number. To provide readers with a better understanding, you must clearly explain the post topic.
3. Upload Only Legal Content
This is another critical point to emphasize. Maintain a trouble-free website at all times. Google Adsense never approves sites that run or display illegal activities on their websites.
Websites containing nudity, violent activities, weapons-related content, drug-related content, hacking websites, and other illegal activities will never be accepted by Google Adsense.
4. Always Post Non-Copyrighted Images
If you are a new blogger and want to add amazing pictures to your blog, this is the place to be. This is the first and most basic mistake made by inexperienced bloggers.
Please keep in mind that, just like website content, you cannot copy and paste any picture from Google and post it on your website.
You must create your own images and photographs. Alternatively, you can post free to use images (that grant you permission to use their images for commercial purposes), which you can download and use them in your blog posts.
You can only post images from those websites on your blog. If you are serious about your blog, you can pay a graphic designer to create images for it as well.
5. Post Content Regularly
Consistency is the Key to success. Google prioritizes bloggers who provide relevant content to their readers on a regular basis.
Every week, you should post at least one post. If you can write more, that is way better for the success of your blog.
Tip: Before considering Google Adsense, I personally recommend that your blog should have at least 40-50 posts. Each post must include at least 750 words of content on each page and category.
This will improve the performance of your website and also increase the chances of getting approved in first try.
You should look for flaws in your site and apply for Adsense. People have received approval from Google Adsense after numerous attempts. So don’t give up. These rules are simple to follow. Just be consistent towards posting.
6. Make Your Website SEO Friendly
SEO is the most significant aspect of any new blogger’s development. If you’re unfamiliar with SEO, you can follow my SEO complete guide. Now you can configure and personalize your website with SEO.
The majority of websites are rejected due to poor SEO. Rankmath or Yoast SEO can be used on WordPress blogs. They offer paid as well as free plugin that will help you with your SEO.
Always use caution when writing your Meta and description tags. This is the primary source of information for Google about your website page.
To improve SEO structure, always write short and simple permalinks. Permalinks are extremely important in SEO. If you’re a WordPress user. You can find all of the information you need about SEO right here.
Requirements:
Google is very concerned with the quality of its ad network. They are extremely strict in terms of the requirements, rules, and regulations that must be followed. The requirements you must meet before signing up for AdSense are listed below.
- You must be at least 18 years old to participate.
- You must have an active Gmail account that is not associated with an AdSense account.
- You must have a website that complies with all of Google’s terms of service.
Pro Tips from Monetize more:
Although the following recommendations are not set in stone, I believe they will increase your chances of being accepted by AdSense.
- Your website should have been up and running for at least three months.
- You should have published at least 30 articles that are distinct and unique to readers.
- There is no minimum amount of traffic that you should have, but the more the better.
How Does Payment Work:
You must earn a minimum of $100 in ad revenue before you can be paid. Keep in mind that Google operates on a net 30 payment term. For example, if you earn ad revenue in September, it will be paid to you in the first week of November – 30 days after the billable month ends.
Step by Step: How To Apply For Your Adsense Account
Began by visiting the AdSense website here: https://www.google.com/adsense/start
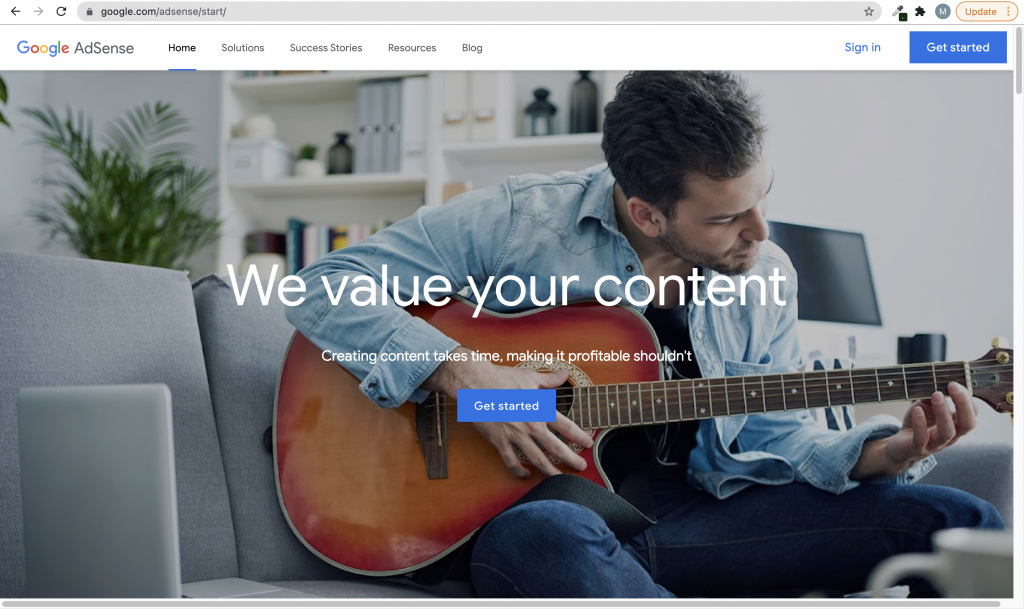
Clicking on “Sign in” on the same page will take you to a page where you must sign in to your Gmail account. After you’ve entered your email address and password, press the “Next” button.
Following that, you will be directed to a page that displays the message shown in the screenshot below. To create an AdSense account, click the “sign up” button.
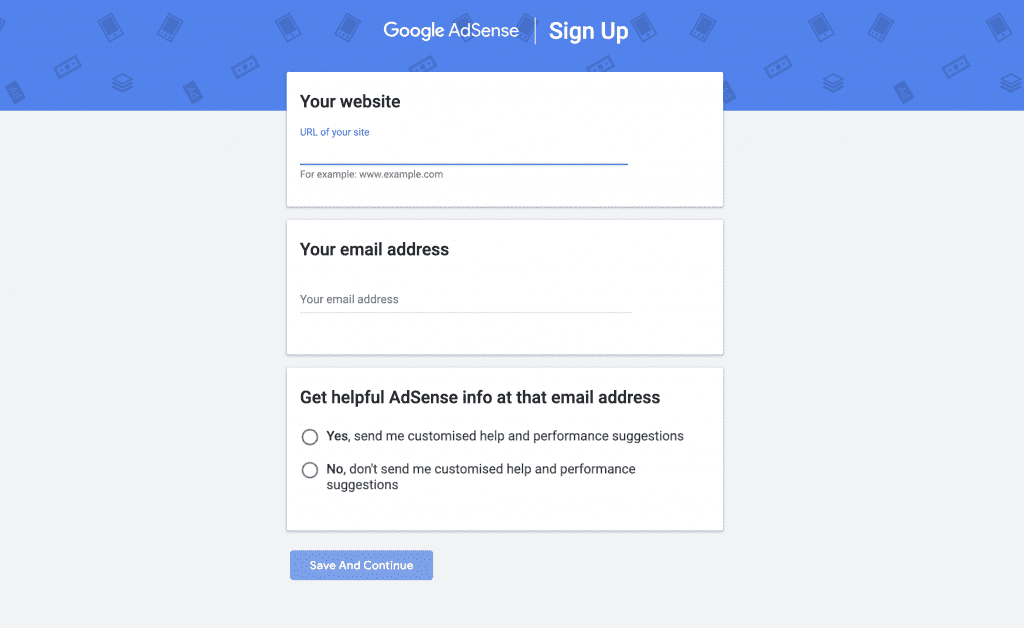
Now you must enter all of your information, including your website and email address. You can also choose to receive personalized assistance and performance recommendations from AdSense. This is what your screen will look like:
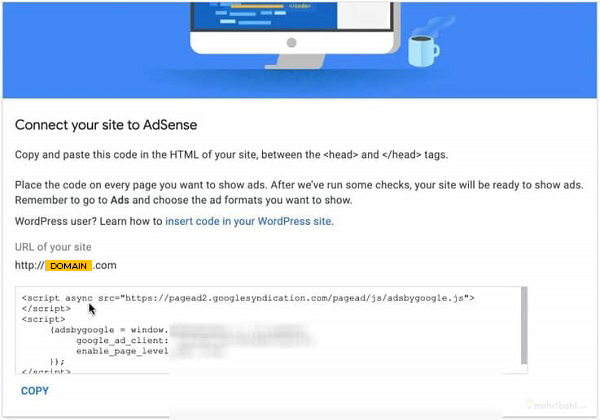
On the following page, you will find instructions for connecting your website to AdSense. AdSense will provide you with a snippet of code that you must insert into your site’s section. When you have a WordPress site, they will also give you specific guidelines on how to do so. After you’ve pasted the code into your website, hit the submit button.
Your website is now ready for review by the Google AdSense team. Maintain the snippet of code on your site until AdSense responds. It can take a few days or up to two weeks for the AdSense team to respond. Once you’ve started creating traffic, be sure to check out our Google AdSense course to learn how to maximize your ads like a pro!
How to Log Into Google Adsense:
It’s a great feeling when your account is approved and you can began making money with ads! However, most people have difficulty locating or accessing the Google AdSense login page. It’s as simple as going to the same URL you used to sign up for an account: https://www.google.com/adsense/start/. Instead of clicking the “Get Started” button, click the “Sign In” button.
Here is the simple and short process for AdSense approval:
Go to Google AdSense and sign up for an account. Please enter all of the correct information for your Name, Address, and Website URL.
Log in to your AdSense account and generate AdSense codes. Insert the codes into your blog’s sidebar.
Ads will appear as blank until the final approval process is completed. Approval could take up to two weeks. Make certain that the advertisements are not removed.
You will receive a confirmation email once AdSense has been approved.
When your AdSense earnings reach $10, AdSense will send you a PIN via mail.
Log in to your AdSense account and enter the Pin you receive once you’ve received it.
You have finished all of the steps. Google will send you or wire your earnings once your account reaches $100. I recommend that you enable AdSense payments via direct bank transfer.
Though this will undoubtedly aid in domain ownership verification, those who sign up using someone else’s website may find it difficult to gain access to AdSense. If they continue to reject your account, it is time to look into AdSense alternatives.
Obtaining AdSense approval is not a difficult task. However, it can be a pain at times because Google does not understand why you are creating this site.
Furthermore, Google can only understand your website by reading your posts and pages.
Before uploading posts, always remember to add significant pages to any new site. Create a contact page, a about page, a privacy policy, a disclaimer, terms and conditions page, and so on.
Furthermore, before applying for AdSense, you should review each and every ad on your site.